ACTIVITY
CELEBRATE SPRING
Many cultures around the world celebrate the return of spring, symbolising rebirth, thankfulness and abundant natural bounties putting an end to the winter ‘hunger gap’. In some cultures, spring is symbolised in the Green Man, whose mythology is common in Northern Europe, but variations can also be found in Ancient Egyptian and Aboriginal artworks.
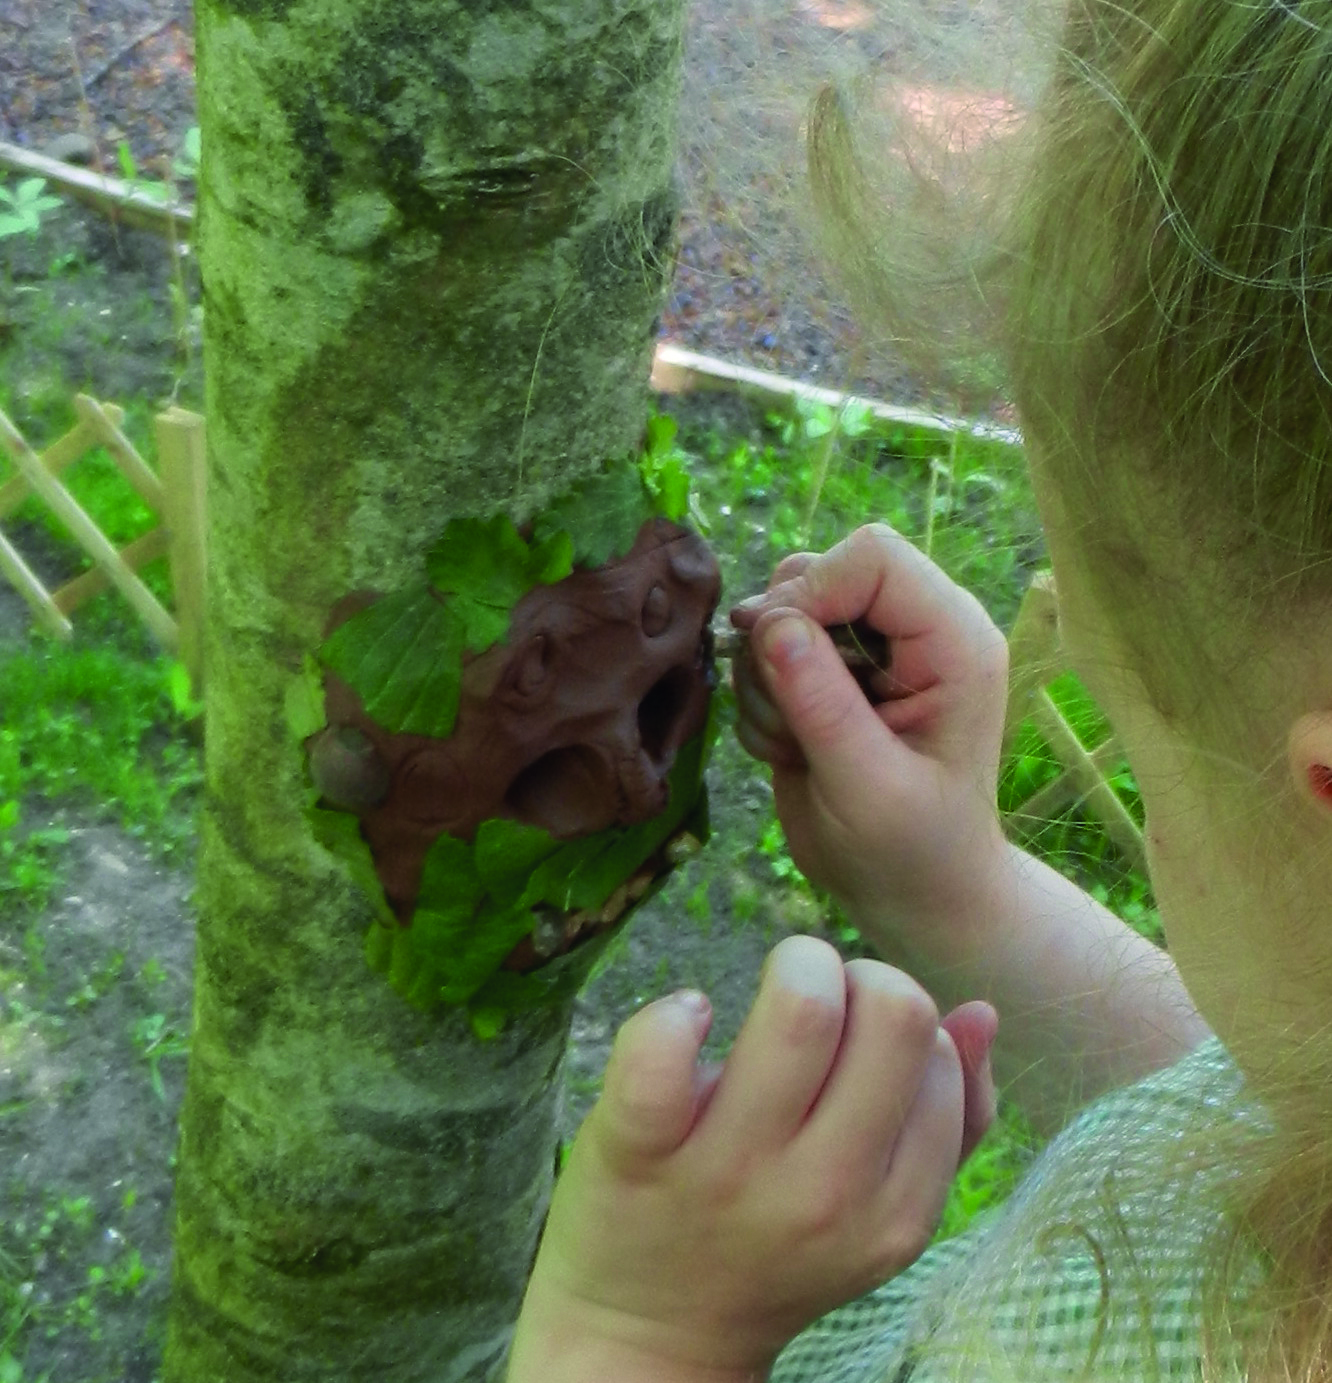
Typically, the Green Man (only rarely a woman!) has a face made from or surrounded by fresh spring leaves. He symbolises fertility and the cycle of life and can be found carved into secular and ecclesiastical buildings. You can find wonderful images and much more information online. And why not make your own Green Man faces to celebrate the arrival of spring in your setting.
Resources: You’ll need air drying clay, ideally without plastic filaments in it; lots of collected natural materials such as small stones, feathers (try to find tiny fluffy feathers as well as wing and tail feathers), flowers and petals, leaves, grass stems, cones, moss; tools to shape the clay – lollipop sticks, teaspoons and so on.
To make your Green Man:
- First, identify locations for the clay faces – a rough surface is best, as the clay will adhere more securely. Look for rough bark, coarse brickwork and old fences.
- Scavenge a collection of natural objects – see above.
- Give each child a good sized lump of clay – at least the size of your fist. They should press the lump of clay onto their chosen surface – you might need to help with this – and use their fingers to shape eyes, a nose, a mouth and chin.
- Shapes and contours could be added using the back of a teaspoon, and lines scored into the clay using the other end of the spoon. Spray the faces while they are being worked on, as the clay will dry out quickly outdoors.
- Decorate and add character to the faces using the natural resources – children can be as wild or as restrained as they like, but encourage them to think and talk about springtime.
- Take lots of photographs of the process and the finished Green Men, as they will last only a week or so outdoors before they completely dry out and drop away from their perch. Spraying them with water can prolong their life a little!
STORY TO SHARE
Bird Builds a Nest by Martin Jenkins, illustrated by Richard Jones
Accompany your stick den-building with this STEM-flavoured tale of how much skill and effort are needed to build a home.
Mummy Bird collects everything she needs and shapes her nest to be as cosy as possible, ready for…what? A charming springtime story, perfect for reading in your own stick ‘nest’ or den, the book is one of a series of ‘first science’ story books and uses rich STEM language to bring Bird’s task to life. There are also several enjoyable renditions of this story on YouTube.
MAINTENANCE
IT’S TIME TO…
- Tackle storage outdoors. Wait for a dry day, and reproof storage sheds with outdoor preservative or paint (an opportunity to revamp them in new colours?), sanding them lightly beforehand to remove any lumps, bumps and splinters. Children can help – most preservatives are water-based and easily applied with paint rollers.
- Audit the resources kept in the sheds outdoors – be ruthless and remove anything that’s at the end of its useful life or is damaged; reorganise so that resources you and the children had forgotten about are readily accessible. Take a pragmatic view of what needs to be put away at the end of the day, and what can be left to pick up play the next day.
- Drill 3-4cm diameter holes in timber posts, and insert stainless steel screws and eye hooks, at a height adults can reach. Children can use the holes to thread string, rope or bamboo through for den-building assistance. The screws can help make instant shelters, or allow you to store resources above children’s reach.
NATURE WATCH
LOOK OUT FOR…
Birds of prey: As newborn animals and minibeasts begin to roam beyond their homes, sightings of birds of prey hovering overhead become more common, even in urban areas. They will have their own young to feed, and will be on the hunt for small mammals and reptiles, or other baby birds. Search online for the silhouettes of birds of prey, and stick them to your windows – one of the easiest ways to identify birds of prey is by matching their distinctive shapes in flight.
Bluebells: If we have a mild spring, bluebells will begin to appear early in April – otherwise it will be towards the end of April. Like all wildflowers, bluebells are protected and mustn’t be picked. Instead, why not plant your own bulbs ready to enjoy next spring?
Tadpoles: If you found frogspawn in March, go back and check for tadpoles. The frogs will have gone by now, leaving their young to fend for themselves. Frogspawn and tadpoles make tasty meals for ducks, newts and water beetles, so you may also spot those.
A NEW PROJECT
BUILD A STICK DEN
Stick dens are very common in Forest School environments, but there’s no reason why you can’t have a semi-permanent one in your setting – building it up and developing it as time passes. My sister, stick-den builder extraordinaire, made such a huge one with her children, it made the local paper!
To create a stick den that can become a semi-permanent structure, the key is a secure framework, and that means long, thick, sturdy branches. Whether you use an existing tree as a launch point, or are making a freestanding structure, it is crucial to ensure the ‘basic’ shape is robust and will withstand wind. This could mean tying the frame together with twine or rope before children begin to weave in the smaller branches. This isn’t cheating!
There are no prizes for going full Bear Grylls – making a stick den is about the process of collecting, choosing, weaving, building, and then having somewhere safe and fun to play in. So, if the children’s work needs a little reinforcement, don’t feel bad about doing it.
Some top tips from my sister:
- Build using a tree as one of your main structural elements, if you can, and with no lower branches to poke children in the eye as they play – you could trim lower branches off if need be.
- Y-shaped ‘live’ branches are perfect to build the first structure, and Y-shaped loose sticks are also very useful when building up the walls.
- If you start building on a damp day, you’ll be able to push the ends of sticks and branches into the soft soil, to help give them extra stability.
- Weave dead branches vertically and horizontally to add strength, and use branches of all different lengths and diameters.
- Teepee-style dens are quick and easy to build, but easily raided by other den-builders – weaving protects your den materials!
Don’t wait until you think the den is finished to test its resilience – push and wiggle at it as you build in order to find and fix loose sticks. Pull up long grasses to weave through the branches – and make this a long-term project. Each time you find a wonderful wind-fallen branch, claim it and add it to the den – by autumn you will have something that is probably cosy and stout enough to sleep in overnight!
RESOURCES
BEG, BUY OR BORROW…
Long logs: If parents are trimming trees or can source really big logs for you, ask them to bring them in for your stick den or giant nest. It would be worth finding out if any parent owns a trailer or a pick-up truck… not just for logs now, but for future favours too!
Nail polish: A few years ago, I put out a call on my town’s Facebook page for nail polish and ended up with hundreds in every colour of the rainbow. Several nail bars donated ‘last season’ colours, and we use them to paint rocks and sticks. The colours are so much more vivid and long-lasting than marker pens, and manipulating the brushes is an art in itself when you’re very young. Just be ready to spend the whole time putting the lids back on properly.
LOOKING AHEAD
MAKE PLANS TO…
Celebrate a really important day in the outdoor learning and play calendar – 20 May is Outdoor Classroom Day, which despite its name celebrates learning outdoors for children of all ages.
There is a plethora of activity ideas, downloads, videos, maps, stories and inspiration for early years settings at www.outdoorclassroomday.org.uk. More than 10 million children have taken part around the globe and you can add your setting to the interactive map to show your determination to make the most of the outdoors.
RISK ASSESSMENT
WATCH OUT FOR…
Loose branches: April’s high winds will dislodge broken branches, and loosen dead or dying boughs. A visual check of any trees on your site each morning should be sufficient to identify possible problems. Keep the branches to make stick dens, nests, or dry them out for firewood.
Puddles: Puddle-jumping is a rite of passage for all children, and by April the risk of ice has pretty much passed. Now it’s likely that the puddles are muddy and very, very attractive! Encourage puddle fun, but do make sure children know to wear overalls if they want to avoid getting cold, and you want to avoid mud indoors.
‘OUR GARDEN IN 2021’
FOR THE RECORD…
Use Earth Day on 22 April as an opportunity to share ideas about habitats and homes. Go on a bug hunt and record the habitats and creatures children find in the garden – remember to be gentle when replacing logs and rocks.
If you’re using one floorbook as a record for the whole outdoor year, begin to go back to your earliest images to allow children to examine and describe the changes they are starting to see in the natural world of their garden.