Making a digital musical instrument – a creative act in itself – allows you to work together with pupils to explore instrument design as well as music-making. There are many ways to approach this. A lot of digital instruments take a recording of string playing, for example, and make it ‘playable’. The first step is to find a sound; there are many available sources online, but finding sounds that are pleasant, free to use and without copyright restrictions can be difficult.
Sourcing
Freesound offers a collection of copyright-free sound files and has been an invaluable place to find interesting and quality sounds. For example, a search for ‘cello’ brings up over 2000 sounds. Although some of these may stretch your definition of ‘cello’ or ‘strings’, there are some beautiful files to choose from, such as ‘C2.wav’ and ‘Cello-A3-other’ for a legato sound; there is also ‘c_s cello B3.aif’ for a pizzicato sound. These give us some of the ingredients with which to create an instrument.
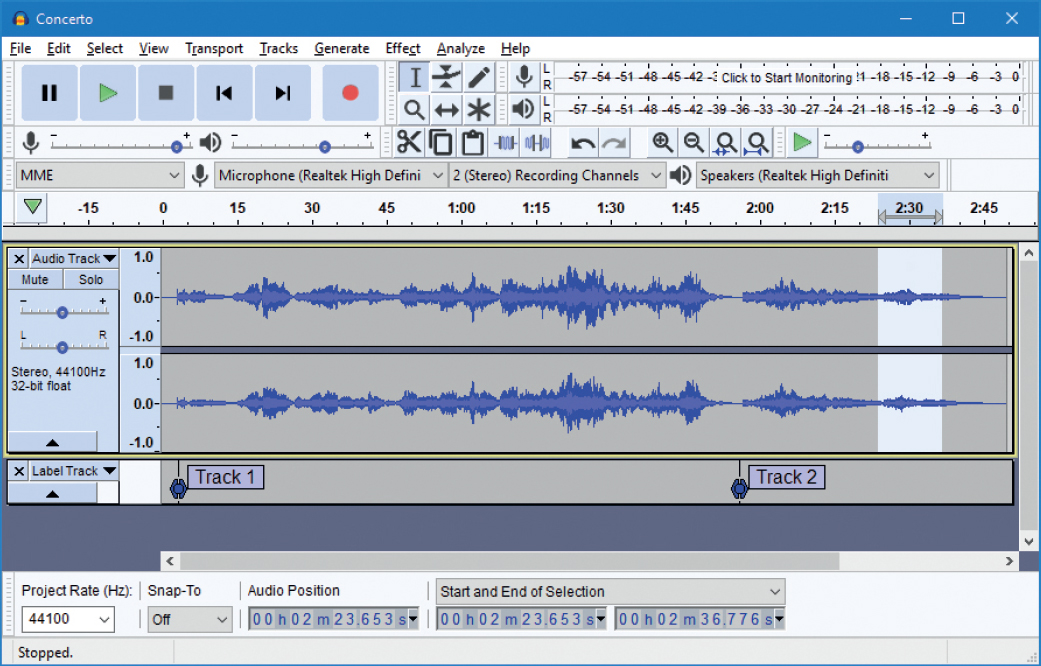
Another way of getting a sound is to record one yourself. Perhaps you have a string player in your class, on your staff or coming to visit. You will need some simple recording and editing software. Audacity is a great starting point as it is free to use for recording and editing. You can even begin a session by showing a class how to record and edit a sound. Recording is easy and intuitive: simply point the screen towards the noise you want to record and get going. Play with different positions for the player and the laptop – you may find that it sounds different – and, if possible, try different rooms to see what effect this has. Give the player instructions – can they play in an unusual way? Enjoy exploring the many options.
 Audio editor, Audacity
Editing
This is the next stage. Most editing software allows you to do all the standard functions such as cut and paste, deleting sections, removing unwanted blemishes or changing the length. Effects such as reverb, echo and speed can polish a sound or change it completely. This is a time to be playful: what does it sound like really slow, really fast or with lots of distortion? Reverse is particularly joyful for those new to editing sound.
Once you have edited the sound (and are happy with the result), you need to save it. WAV is a good choice of format as it is high quality and widely supported. Another good choice is MP3, which takes up much less data.
Check which files work with your other software when making a decision. If you are using Audacity, you will need the ‘export’ menu to save as WAV or MP3.
Playing
Now we have some files, it’s time to make them playable. To do this we need to use a sampler. There are lots of options for this and the function can be included in other software, for example Garageband on the iPad, Ableton Live and Bandlab, which all have sampler functions built in. Soundplant is a great standalone option, with a free version that is compatible with WAV files. Soundplant works to turn the keyboard of a computer into a responsive sound player without any other special setup or equipment. It is simple to use, as you can just assign your sound clips to different keys. You can then play your new instrument by using the keyboard.
Samplers can also allow further edits to the sound. You can transform a sound into something completely unrecognisable using speed, filter or reverse. Edit the beginning and end of the sound to change how it articulates, and experiment with looping to create sounds that sustain while you hold down a key.
It is amazing that, with just two pieces of free software, children are able to turn a laptop into a playable musical instrument. What’s more, should they wish to explore further, the software puts no financial expectation on them beyond having access to a computer.
Going further
Focusing on the pupils’ freedom of expression gives them agency as makers of sound and music. You can bring them closer to the real working-world of sound designers by setting closer briefs; for example, ‘evoke the drama of a storm at sea’ or ‘must be in the key of E’. Also, you can combine these homemade digital instruments with traditional instruments, using laptops as part of an ensemble. I have successfully used this set-up with laptops plugged into guitar amps to include music technology in youth orchestras, allowing young people who hadn’t previously considered themselves to be musicians a chance to perform alongside their peers.
Beyond digital instruments, with a few extra materials, you can also turn your sound clips into a DIY instrument that can be played (with a little help from technology). There are many ways to do this. One way is to use a circuit board that bridges the computer and physical worlds through the use of crocodile clips. This allows you to make physical instruments with anything that will conduct electricity. This can include kitchen foil, instrument strings, copper tape, wire, a pencil, conductive paint, paper clips, paper fasteners, play dough, fruit, flowers or even vegetables! Physical structures can be made of paper or card, or anything you have available. Children can use their imagination to create wonderful designs and make a whole host of amazing and unique musical instruments.
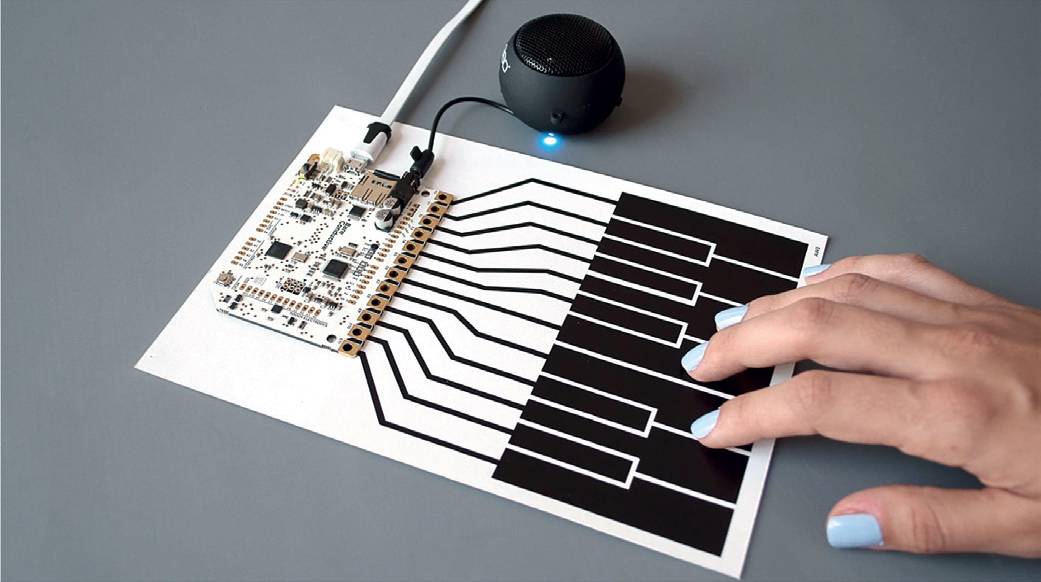
There are several circuit boards suitable for children, depending on your priorities. Bare Conductive’s Touch Board is a device that works with MIDI, so would be a good choice if you are working, for example, with Bandlab, GarageBand or Ableton Live. Touch Board also has a function where you can play MP3 files from its own SD card, allowing for standalone use. The BBC micro:bit is relatively cheap to buy and is focussed on educational coding, and has its own music functions built in.
 Bare Conductive’s Touch Board
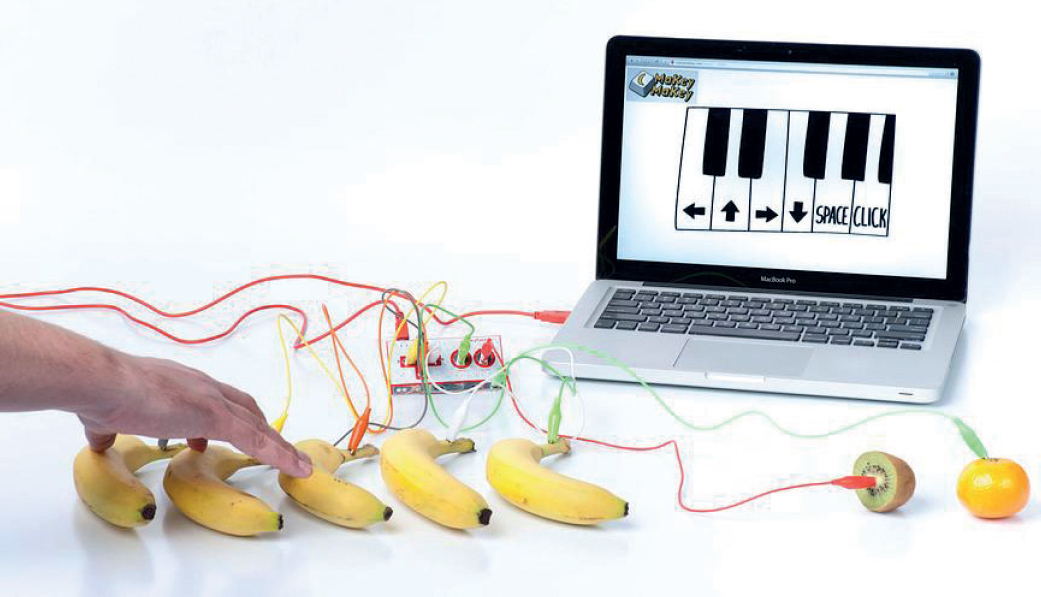
My personal favourite for the classroom is Makey Makey, which is a very robust piece of kit and child-friendly. Makey Makey was designed to make your own games controller, replicating the keyboard on your computer, but we can put it to other uses with Soundplant.
 A banana piano using Makey Makey
One of my favourite things to do is to recreate traditional musical instruments using non-traditional materials, as in the next example:
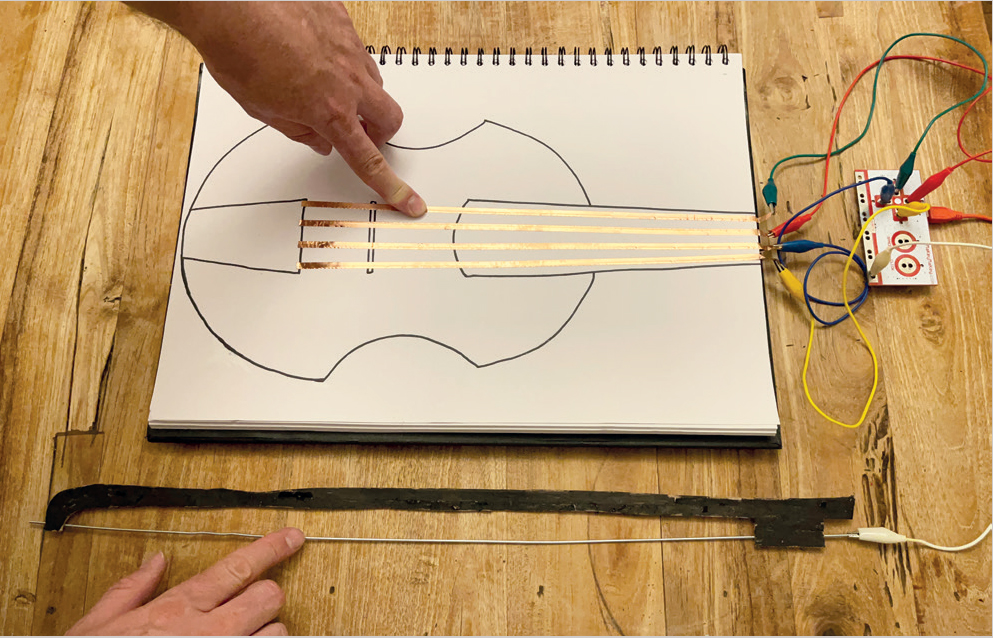
Make your own musical cello

Materials: Makey Makey; crocodile clips; copper tape (or substitute); coat hanger; card; pen; and glue gun or tape.
- Draw the shape of a cello (or another instrument) clearly on the paper. Create the strings using thin pieces of copper tape or other conductive material. Attach the string to the piece of paper using glue if necessary. The cello is now complete.
- Now make a bow. Cut a coat-hanger and attach it to a cardboard handle with hot glue. Now your instrument is complete.
- The final step is to connect it up to the Makey Makey to make a playable cello. Attach crocodile clips between the arrows and the copper strings and between the earth wire and the bow. Now, using the coat-hanger bow, you can play your cello.
Final thoughts
There are so many tools now to make your own wonderful and creative instruments fairly easily. It is such an exciting time to be teaching people of all ages about the wonders of music. We get to cross between science, electronics, music, art, sculpture and performance. The availability of free software means that once you get started with sound and instrument design, the only limit is creativity.
It still surprises me what children and young people will come up with using these basic tools. I’ve seen musical clocks, marble-runs, twister and pictures, to name just a few. We live in a world of constant innovation where, with a little support, young people can direct their own technological and musical futures as creators.


